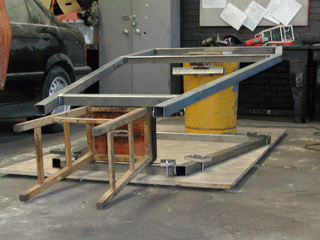
Step 1 was to purchase a sheet of 18mm MDF to use as a jig for the frames. The upper and lower planform were marked and holes drilled either side to accept a length of threaded rod. The cut tubes were put in place and clamped to the board using offcuts of plywood. This ensured that there was no distortion during the welding process. We then spent some time learning to weld, and here is the first Top Tip – MiG welding works MUCH better if you have gas in the bottle……..nuff said?


The top and bottom frames were then accurately positioned using a precision jig and the corner uprights cut to fit. Some time was spent ensuring an accurate fit prior to welding. As this was the first angled weld, a test piece was welded first – eventually with good results. However, when I tried on the chassis, it was awful! Nothing for it but to grind it off and start again. And again…Returning home in a foul mood, I kicked the cat and went to bed. Next day, same settings, nothing changed produced decent results. Doh!


After the considerable effort cutting the uprights, for the diagonals we used a long length of paper to prototype the tube. This was wrapped around the tube then marked and cut. This gave excellent results with a good fit virtually straight away. Top Tip Two – Paper is SO much easier to cut than steel!

No comments:
Post a Comment